Starting a lifestyle blog is an excellent way to share your passion with the world. If you do it right, you can turn your hobbies and interests into a full-time blogging career.
Don’t worry, we’ll show you how.
This guide will go over how to start a lifestyle blog in easy steps.
Let’s get started!
What is a Lifestyle Blog?
A lifestyle blog is a type of website where a blogger writes about their own life, experiences, interests, or daily activities.
Because of this, lifestyle blogs are often more personal than other types of blogs. Rather than just sharing the latest news about an industry or teaching readers about a subject, lifestyle bloggers share their personal experiences to inspire others.
And with lifestyle blogging, you don’t have to stick to just 1 topic. You can create content about various subjects relevant to your life like parenting, cooking, fitness, beauty, college life, and everything else in between.
Let’s take a look at some examples of lifestyle blogs for better understanding…
Step #1: Decide on your niche
Whether you’re wondering how to start a lifestyle blog on Instagram or any other platform, the first step is always the same. You need to come up with your unique selling point. And this starts with determining your niche.
Simply “lifestyle” is a broad topic that will make it difficult for your blog to stand out among countless others. Today, there are well over 600 million blogs online. Learning how to start a lifestyle blog in 2022 is quite different than it was in the early days of blogging.
With a suitable niche and a narrower focus, you’ll have an easier time coming up with relevant topics, attracting your target audience, and outperforming direct competitors. Overall, you’ll simplify your blogging experience by making a smart choice now.
Step #2: Select your blogging platform
Some web development skills can be quite useful when you’re figuring out how to start a lifestyle blog. But, you don’t have to spend years learning how to code. All you need is a reliable blogging platform. It will enable you to easily manage, publish, and edit the content on your site, without any prior programming knowledge.
You have several ready-made blog sites and content management systems at your disposal such as WordPress, Wix, Squarespace, etc.
Regardless of which blogging platform you choose, you’ll have to decide whether you want free web hosting or an open-source self-hosted blog.
Free web hosting
Free web hosting is exactly what it sounds like – a free service that provides you with the tools to launch your website. The best examples of free web hosting platforms are WordPress.com and Blogger.com.
You’ll get access to all of the basic features, themes, gadgets, and templates, but there are a few drawbacks.
While you can choose the name for your lifestyle blogs, your domain name would appear as [yourwebsitename].wordpress.com or [yourwebsitename].blogspot.com. If you want to choose your domain name or use any advanced features, you’ll need to upgrade.
Going for the free web hosting option will also bring some other limitations. You’ll have limited storage, sub-optimum bandwidth allocation, and you’ll have no say in ad choice and placement. Overall, it’s not the best option, but it can be a good place to start.
Step #3: Name your blog
While the name isn’t the most important aspect of your lifestyle blogs, it’s still necessary to think carefully about it. After all, it’s likely the first thing your readers will notice, so you want it to act almost like your brand ambassador.
Keep the name:
Short and sweet
Memorable
Unique
Easy to spell and pronounce
It needs to resonate with your audiences, so make sure to pick a good blog name.
The annual price for a name typically goes between $10 and $15 per .com domain. Our favorite domain hosting service for lifestyle blogs is Hostinger. You can choose your domain name for free, use one you already have, or simply come up with one later, just before you launch your blog.
Step #4: Get hosted
Lifestyle blogs don’t simply float around in the ether. Everything that exists on the internet needs to be stored on a server so that it’s accessible for viewing at any time. Since it’s generally difficult (and not to mention expensive) to create your own servers, you need to outsource your hosting needs.
Web hosting enables you to rent or buy a space where you’ll house your blog. You’ll get access to servers, data centers, and accompanying services that allow your blog to live online and be connected to the internet.
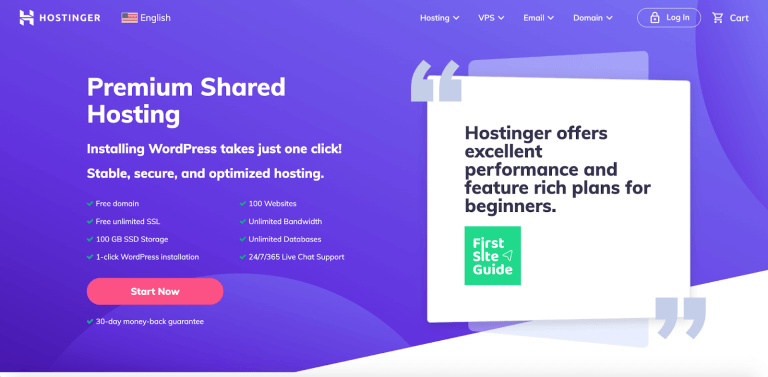
As we already mentioned, our recommended web hosting provider isHostinger. It offers a free domain name in the first year when you buy their services and a thirty-day money-back guarantee.
Step #5: Launch your blog on WordPress
Step 1. Visit the Hostinger homepage
To set up Hostinger, visit the Hostinger website and locate the red “Start Now’’ button on the homepage
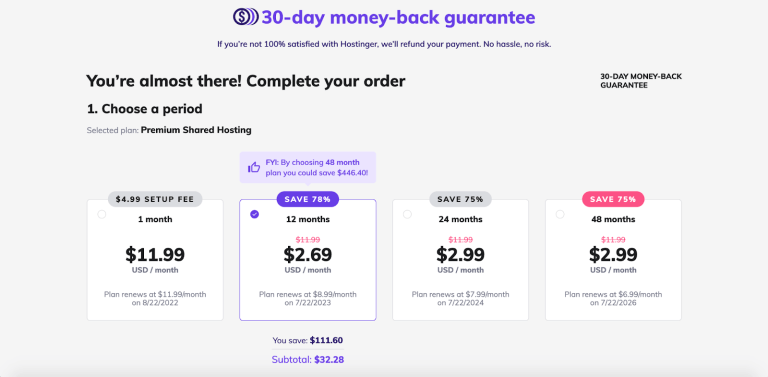
Step 2. Select your hosting plan
Your Hostinger journey starts with choosing a hosting plan. Hostinger offers four hosting packages – 1, 12, 24, and 48-month plans.
A 1-month plan allows the user to test the available features and understand how WordPress and its plugins work.
Clients can save money with a 12-month hosting plan while accessing all of the necessary features. However, 24 and 48-month plans offer the most value for your money.
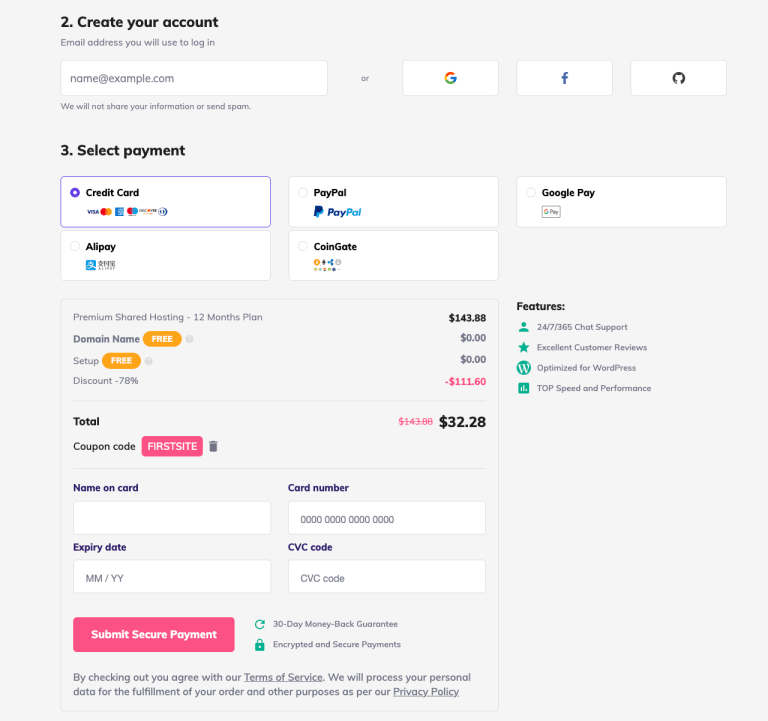
Step 3. Create an account and enter your financial details
After selecting your hosting package, proceed to complete the registration process and create your account.
Registration with Hostinger requires basic information such as your payment info and a valid email address. You can also use your Github, Facebook, or Google account.
Choose a preferred payment method and complete your order. Hostinger offers five payment methods:
Credit card
CoinGate
Alipay
Google Pay
Paypal
Complete your transaction by entering your financial credentials and payment information. Submit your payment by clicking on the “Submit Secure Payment” button.
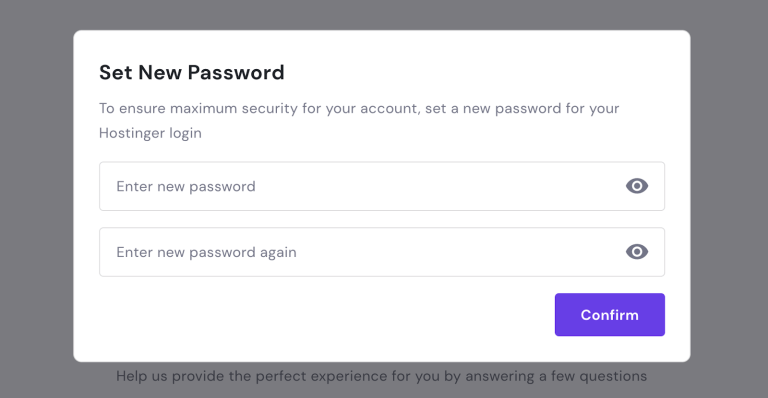
Step 4. Set your account password You will need a strong password to complete your account setup. Make sure to create a unique password for maximum security for your account.
Step 5. Start a lifestyle blog by setting up WordPress The easiest way to enjoy an excellent user experience with Hostinger is to add as many basic details as possible before starting a blog.
Complete their short questionnaire if you’re new to starting a blog. It’s important to provide some basic information to make the process run more smoothly.
Step #6: Set the theme
If you want to learn how to start a lifestyle blog and make money, you also need to learn how to layout and design a lifestyle blog. You want a visually appealing design that will attract your target readers and reflect your personal preferences.
Luckily, there are thousands of free and paid themes you can choose from on WordPress.org. You’ll find them inside your WordPress dashboard under “Appearance”.
Remember that each theme will customize a bit differently, so it’s a good idea to check out a few different ones. When selecting your theme, always be sure to:
Preview the theme before activating it
Check the features it comes with
Take a look at the ratings
The sheer number of available themes on WordPress.org can be overwhelming, but don’t worry. You can always change the theme later if you want, so it’s not a serious commitment.
Step #7: Publish and promote
Now, you’re all set to start publishing your posts and attracting audiences. Keep in mind that you won’t get millions of readers overnight. To succeed, you need patience, commitment, and a love for blogging.
Publish regularly
Consistency is key to succeeding as a lifestyle blogger. Publishing regularly and at a scheduled time will show your professionalism and dedication to your blog. Your readers will know when they can expect to hear from you, and your blog post will become a part of their normal routine.
It doesn’t matter if you want to post once a day or once a week, as long as you stick to your schedule.
Thank you for your Valuable Time 💫

Leave a comment